How to Build Your Own Website from Scratch with No Experience
A beginner's step-by-step guide to building your first website with HTML and CSS, testing it on your computer, and publishing it online for free.
Published 5 min read
In this article
To build a website from scratch with no experience, you need three things: a code editor, a basic understanding of HTML (the structure) and CSS (the design), and a free place to publish the files. You write a page on your computer, open it in your browser to test it, then upload it to a free static host so anyone can visit it.
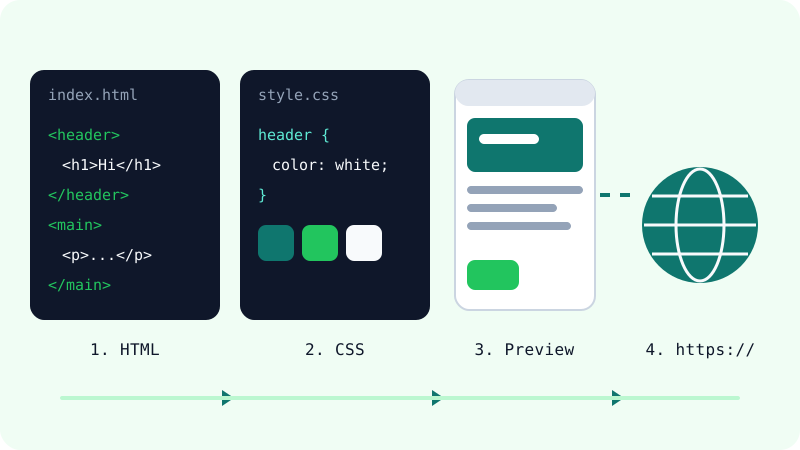
In short: plan your pages, write an index.html file, style it with a style.css file, test it in your browser, then publish it for free and connect a domain if you want one.
First, choose your path: website builder or code?
There are two main ways to make a site. Both are valid; they suit different goals.
| Website builder | HTML and CSS (this guide) | |
|---|---|---|
| Skills needed | None, drag and drop | Basic HTML and CSS |
| Speed to first site | Very fast | A few hours |
| Control over design | Limited to the builder's options | Full control |
| Cost | Free plans are limited; paid plans are usually monthly | Can be completely free, except the domain |
| What you learn | How to use one tool | Skills that transfer to any web project |
This guide takes the code path, because it teaches you how websites actually work and costs little or nothing. If you later want to understand where HTML and CSS fit in the bigger picture, read our explanation of frontend vs backend.
What you need before you start
You don't need to install anything complicated:
- A code editor. Visual Studio Code is free and works on Windows, macOS and Linux. Our VS Code setup guide covers the settings and extensions worth adding.
- A web browser. Chrome, Firefox, Edge or Safari. They all include developer tools.
- A project folder. Create a folder called
my-websitesomewhere easy to find.
That's it. HTML and CSS run directly in the browser, so there's no compiler or server to set up.
Step 1: Plan your site on paper
Before writing code, decide what the site is for and what goes on it. For a first project, keep it to one page with a few sections, for example:
- A header with your name or project name.
- An "About" section with a short paragraph.
- A section for your work, services or projects.
- A contact section with an email link.
Write the actual text first. Most beginners get stuck designing around empty boxes; real content makes layout decisions much easier.
Step 2: Write the HTML structure
Inside your folder, create a file called index.html. The name matters: web servers look for index.html as the home page by default. Paste this starting point:
<!DOCTYPE html>
<html lang="en">
<head>
<meta charset="UTF-8">
<meta name="viewport" content="width=device-width, initial-scale=1.0">
<title>Sara Ahmed | Web Designer</title>
<link rel="stylesheet" href="style.css">
</head>
<body>
<header>
<h1>Sara Ahmed</h1>
<p>Learning web design, one page at a time.</p>
</header>
<main>
<section>
<h2>About me</h2>
<p>I build simple, fast websites for small businesses.</p>
</section>
<section>
<h2>Contact</h2>
<p><a href="mailto:hello@example.com">hello@example.com</a></p>
</section>
</main>
<footer>
<p>© 2026 Sara Ahmed</p>
</footer>
</body>
</html>
A few things to notice:
<head>holds information about the page. The<title>is what appears in the browser tab and in search results.- The viewport meta tag makes the page display properly on phones. Don't remove it.
<header>,<main>,<section>and<footer>describe the meaning of each part, which helps both accessibility and search engines.- There should be one
<h1>per page, followed by<h2>headings for sections.
Step 3: Add design with CSS
Now create style.css in the same folder. The <link> tag in your HTML already points to it.
body {
  margin: 0;
  font-family: system-ui, sans-serif;
  line-height: 1.6;
  color: #1f2937;
}

header {
  background: #0f766e;
  color: #ffffff;
  text-align: center;
  padding: 48px 20px;
}

main {
  max-width: 700px;
  margin: 0 auto;
  padding: 20px;
}

a {
  color: #0f766e;
}

footer {
  text-align: center;
  padding: 20px;
  color: #6b7280;
}
max-width combined with margin: 0 auto keeps your text in a readable column on large screens while still shrinking on small ones. Change the colours and padding values and refresh the page to see what each rule does; experimenting is the fastest way to learn CSS.
Step 4: Test the site on your computer
Double-click index.html and it opens in your browser. Then check a few things:
- Mobile view: open the developer tools (usually
F12, or right-click and choose Inspect) and switch on the device toolbar to preview phone sizes. - Links: click every link and make sure it goes where you expect.
- Errors: the Console tab in the developer tools shows errors if something fails to load, such as a misspelled file name.
Keep file and folder names lowercase with no spaces (for example about.html, not About Me.html). Many web servers treat file names as case-sensitive, so a link that works on your computer can break once the site is online.
Step 5: Publish your site for free
A site made of HTML and CSS files is a static site, and several services host static sites on free tiers, including GitHub Pages, Cloudflare Pages, Netlify and Vercel. The general process is similar on all of them:
- Create a free account.
- Upload your folder, or connect a GitHub repository that contains it.
- The service gives you a free web address on its own subdomain.
Our guide to free website hosting compares these options. When you're ready for your own name, you can buy a domain on Namecheap and point it to your host.
Common beginner mistakes
- Starting too big. Finish one good page before adding more.
- Forgetting the viewport tag. Without it, your site looks tiny on phones.
- Using images straight from a camera. Large photos make the page slow. Resize and compress them before adding them.
- Copying code you don't understand. Change one thing at a time so you know what each line does.
- Skipping the
altattribute on images.alttext describes an image for screen readers and search engines.
Once your first page is live, add a second page, learn a bit of CSS layout (Flexbox is a good next step), and keep building. Every site you publish teaches you something the previous one didn't.
Frequently asked questions
How long does it take to build a simple website with no experience?
A simple one-page personal site can be built in an afternoon or a weekend if you follow a guide. Learning HTML and CSS well enough to build larger sites on your own usually takes a few weeks of regular practice.
Should I use a website builder or learn HTML and CSS?
If you just need a site online quickly and don't want to learn code, a website builder is fine. If you want full control, lower long-term costs and a skill you can grow, learning basic HTML and CSS is worth it.
Do I need to buy hosting to publish my website?
Not for a simple static site. Services such as GitHub Pages, Cloudflare Pages and Netlify can host HTML and CSS sites on their free tiers. You only pay if you want a custom domain name or need more advanced features.
Why does my site look fine on my computer but broken on my phone?
Usually the viewport meta tag is missing or elements have fixed widths in pixels. Add the viewport tag to the head of your page, use max-width instead of fixed width, and test with your browser's device mode.
Related tutorials
Websites & hosting
How to Connect Your Domain to Cloudflare Pages (Step by Step)
Connect a Namecheap domain to a Cloudflare Pages site: add the site to Cloudflare, switch nameservers, attach the custom domain and redirect www.
· 6 min read

Websites & hosting
Docker for Beginners: What It Is and How to Use It Step by Step
A beginner-friendly Docker guide: what images and containers are, how to install Docker, the key commands, and how to build your first image.
· 6 min read
Websites & hosting
Best Free Website Hosting: Cloudflare Pages, GitHub Pages, Netlify and Vercel Compared
Compare the best free hosting for static sites, including GitHub Pages, Cloudflare Pages, Netlify and Vercel, and learn which one suits your project.
· 6 min read